Game Development with PyGame Zero + Mu Editor
A step by step approach to building a simple game based on the excellent article: https://www.mattlayman.com/blog/2019/teach-kid-code-pygame-zero/
Install Mu Editor
For this session you just need to install the Mu Editor (it is already installed on the Raspberry Pi) so for Windows & OSX you can install it here: https://codewith.mu/
Launch Mu Editor and select Pygame Zero Mode
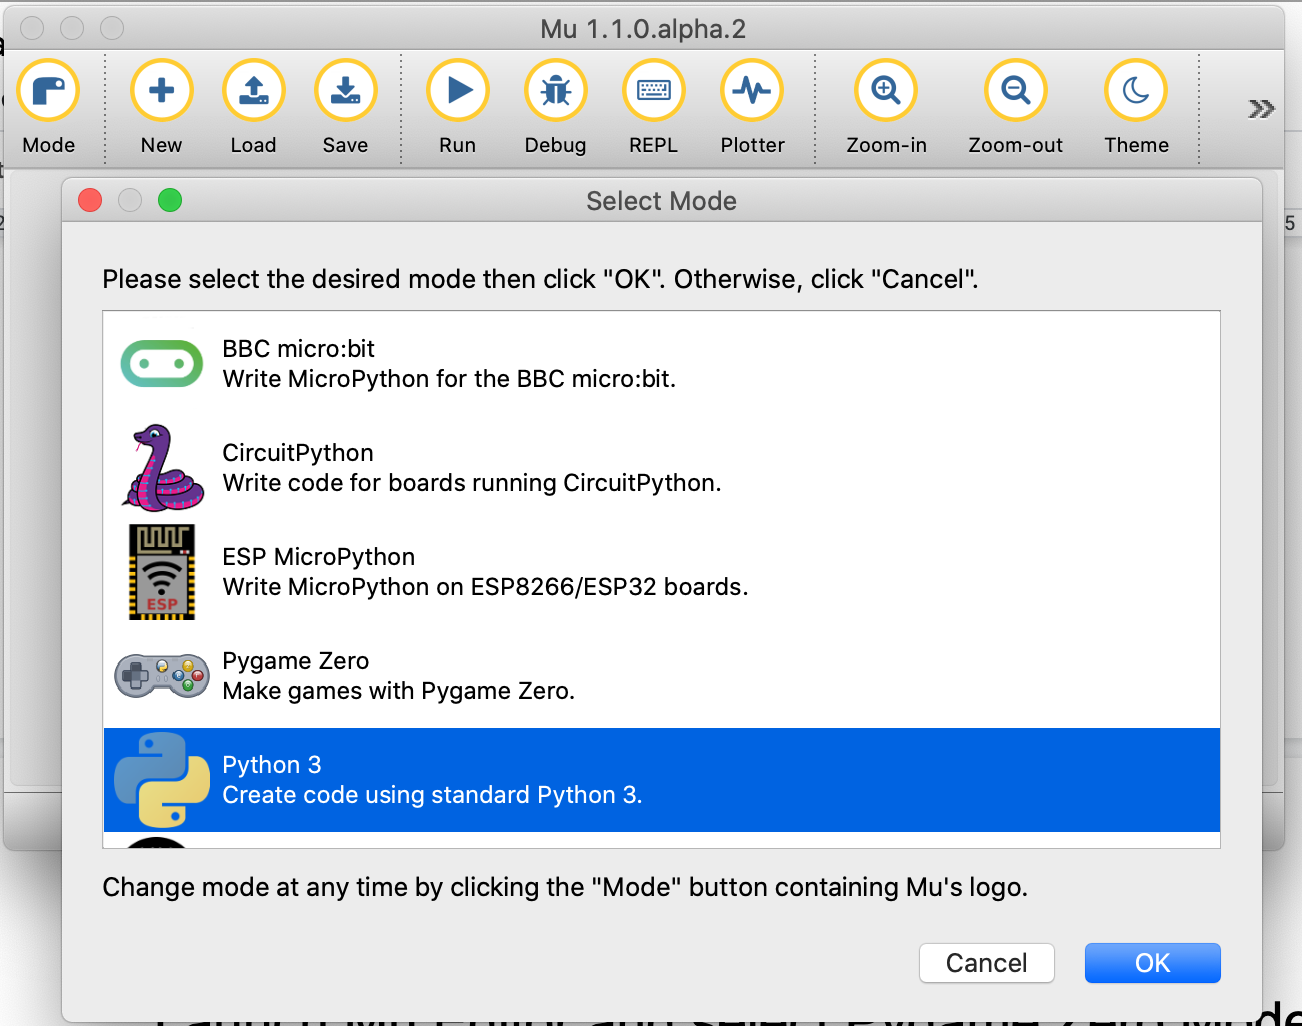
Launch Mu Editor on your computer and it will prompt you to select which “Mode” you wish to use. Your options may be different to what is shown here, but make sure you select “Pygame Zero” and then press OK.

Add code to open a custom sized game window
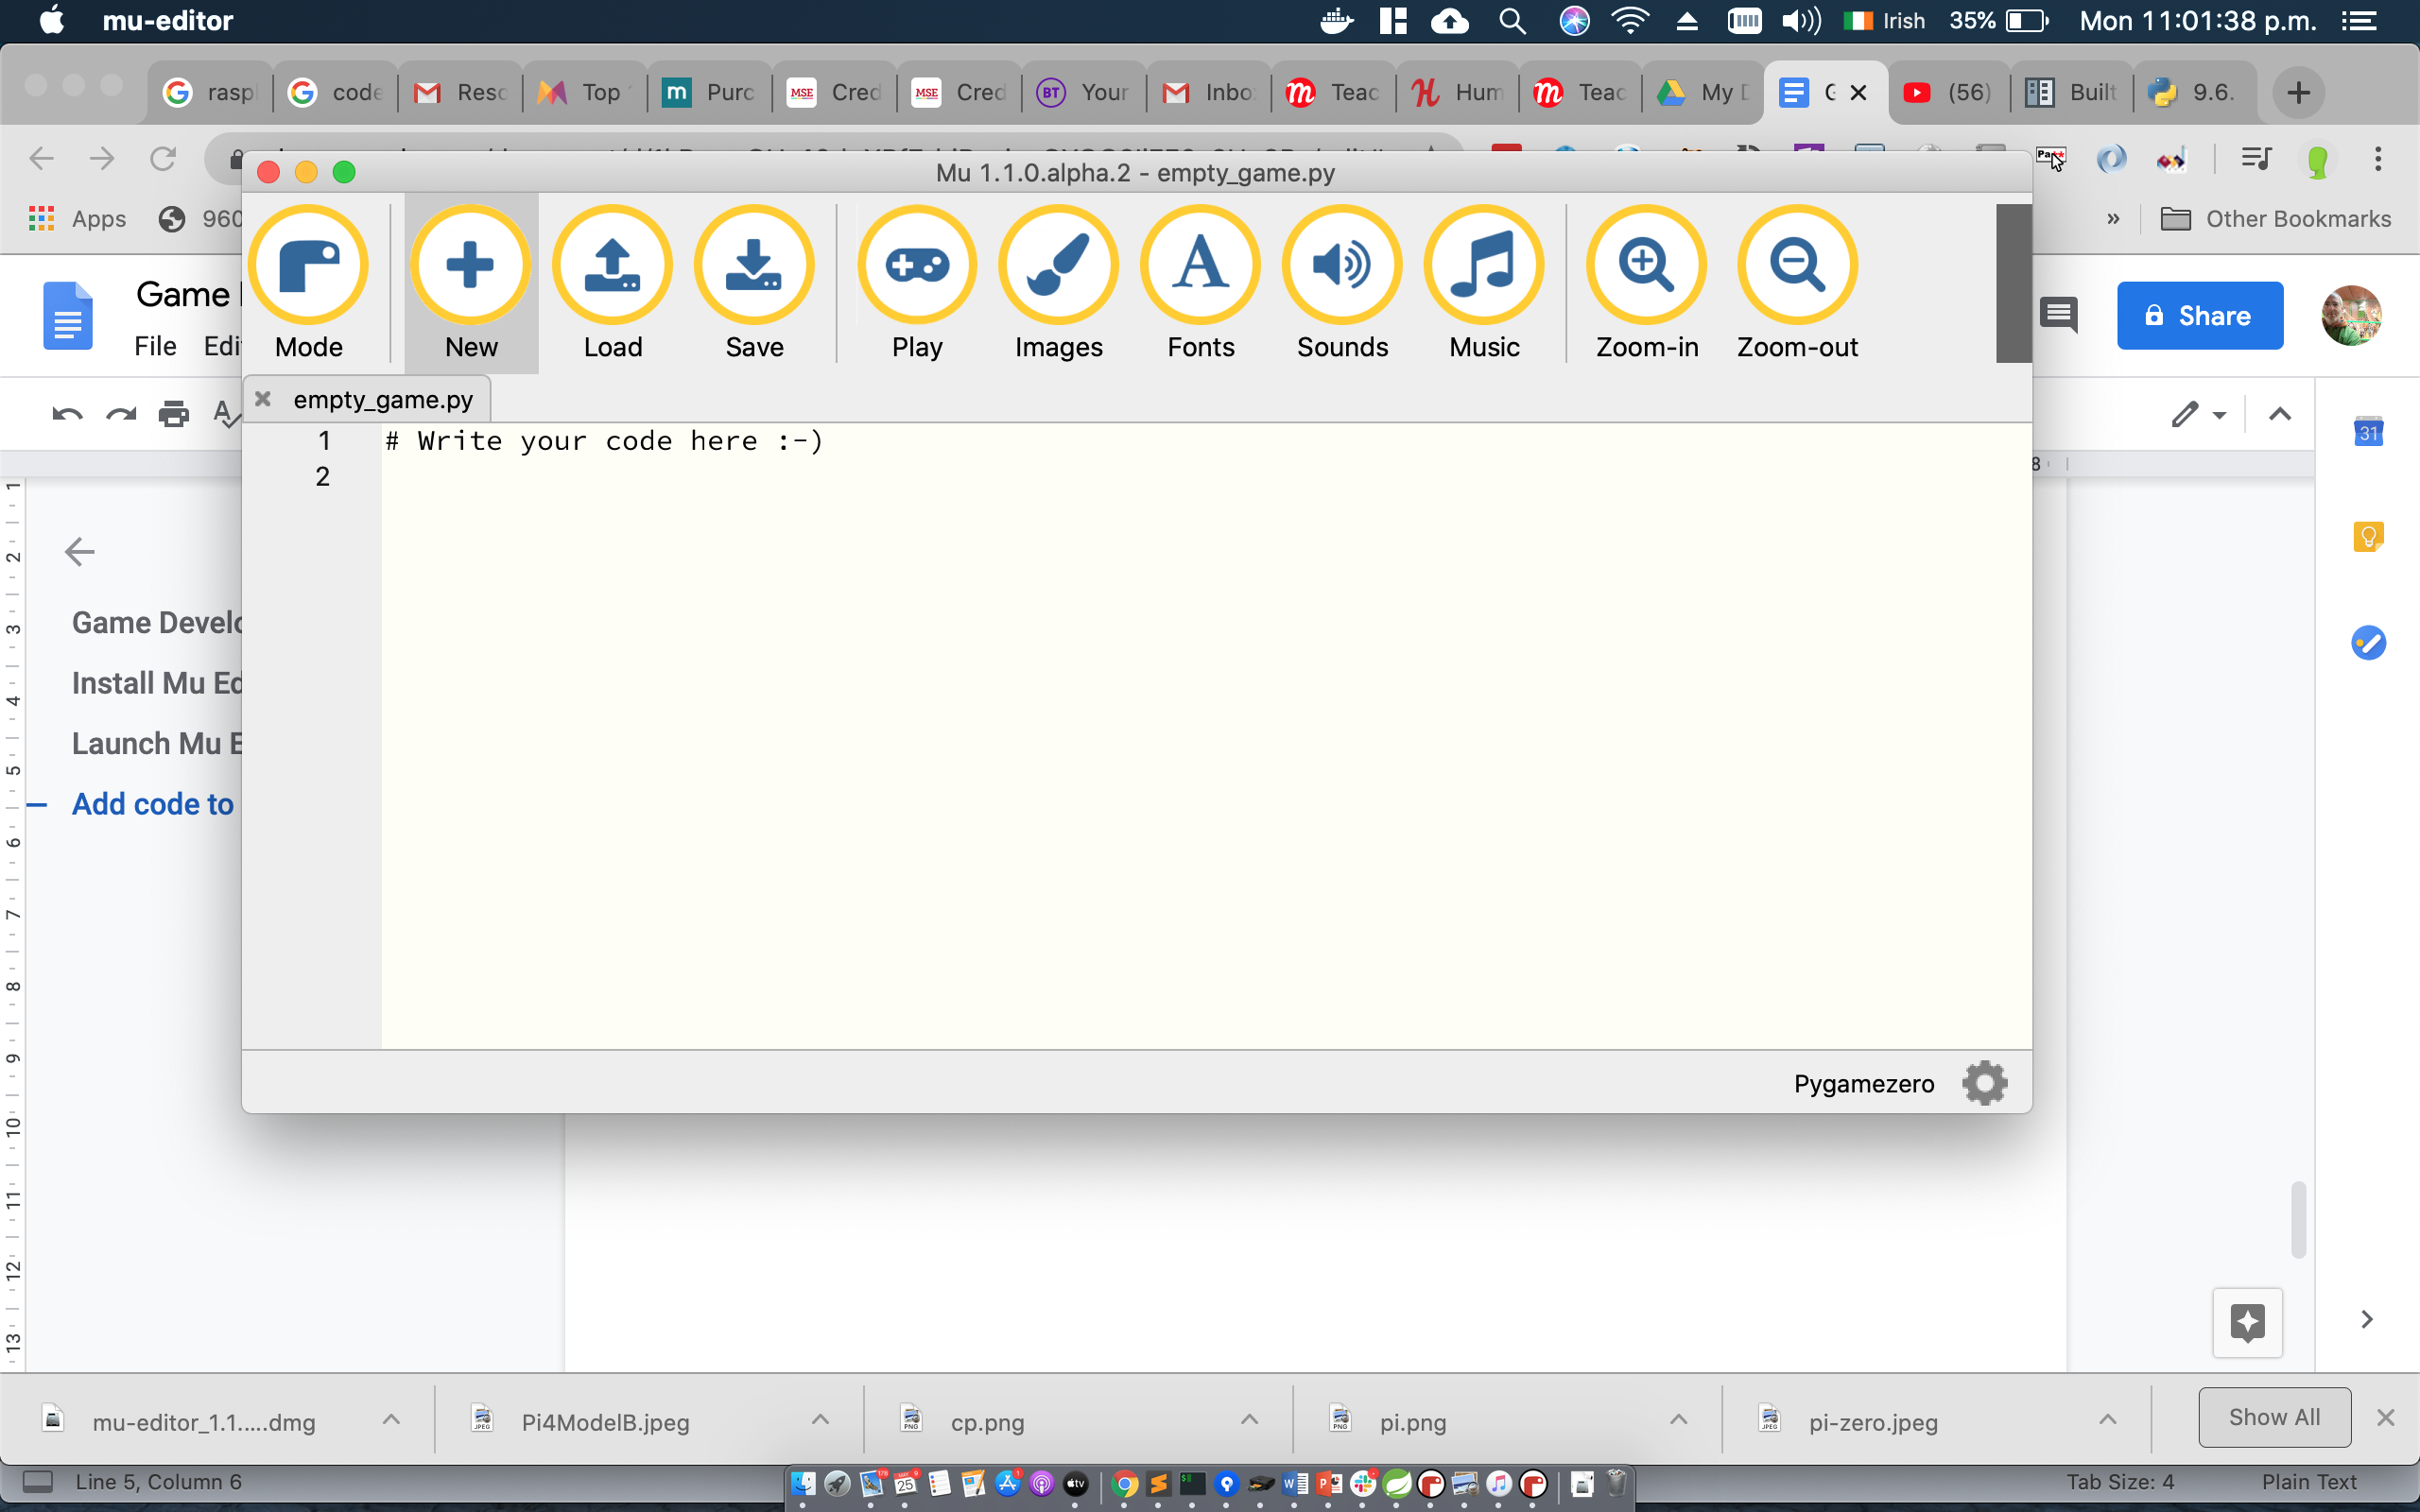
The Mu Editor will look like this. To create a window you need to add…absolutely nothing :D To prove this, click on the “Play” button. It will prompt you to save your file, so give it a name like my_first_game.py or something equally exciting. Once you’ve done that a black window of WIDTH=800 and HEIGHT=600 will appear. Close that for now and press “Stop”. So what happened here? Under the covers, the Mu Editor is actually running the following command:
pgzrun my_first_game.py

To change the size of the window that appears, let’s add the following code to the editor:
WIDTH=200
HEIGHT=200
And then press “Play” yet again. Notice how much smaller the screen is this time!
Add an Actor to our Game

Adding an actor is roughly the same concept as adding a new sprite in Scratch. When we add our actor, we want to make sure we position them in the right spot.
If you recall, in Scratch a position of 0, 0 is actually the middle of the screen, but in Pygame Zero 0, 0 is actually the top left corner of the screen. We also have different positions for our Actor as you can see here on the left.
Let’s add code to add our Actor and also draw them:
alien = Actor('alien', center=(100,100))

def draw():
    screen.clear()
    alien.draw()
Press “Play” and see what happens. Stop the program and change the line starting with alien to the following:
alien = Actor('alien', midbottom=(100, 200))
To check out what our code should look like at this point, go here: https://gist.github.com/KramKroc/87b904ade204b63ab0b9b7d13899f971
Draw and Update

draw() and update() are two key concepts in Pygame Zero so let’s take some time trying to understand what they do!
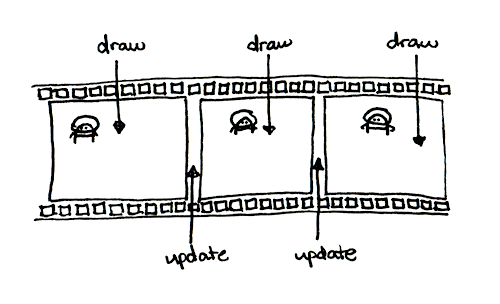
We’ve encountered draw() already, it is called by Pygame Zero when it needs to redraw your game window. In our example we clear the screen of any existing effects and then instruct the alien actor to draw itself on the screen. Note: it is important you do not modify or animate something within the draw function, you do this in the update() function.
update() is called by Pygame Zero to step your game logic, i.e. moving characters etc. This will be called repeatedly, 60 times a second. On a simple level, once your update function is completed, draw() will be triggered.
In this example, our alien character will be moved to the right. Run the code and see what happens:
def draw():
    screen.clear()
    alien.draw()

def update():
    alien.left += 1
https://gist.github.com/KramKroc/366a679cb1508673e09555a15f814164 <- Check this code snippet if stuck.
Loop character back onto the screen
From our last piece of code, the character pretty quickly disappears off the right hand side of the screen. Let’s add some code to detect that and shift him back over to the left hand side.
We already know the WIDTH of the screen as we’ve defined it so we simply need to check if the left part of the alien (alien.left) has moved beyond that WIDTH, i.e. alien.left > WIDTH, and then make it so that the position of the alien’s right side (alien.right) is set to 0, i.e. the left side of the screen. This is a lot clearer when we look at the code:
def update():
    alien.left += 1
    if alien.left > WIDTH:
        alien.right = 0
If you think this would look better on a bigger screen you can play with the WIDTH and HEIGHT constants to make the screen bigger.
Also, if you’d like to increase the speed of the actor moving across the screen you can play with the alien.left += 1 in the update() function, changing to higher and higher numbers, but you will notice that the movement may look jumpier, losing some of the smoothness of animation.
Again, if stuck, you can see a working example here: https://gist.github.com/KramKroc/9826f5917fbf85e29c6d20f6446e3de2
Let’s add some randomness
Simply having him looping on and off the screen can be a bit dull, can’t it? Lets add a pinch of randomness! Pygame Zero itself doesn’t have a random function, but thankfully we can use a standard Python library for that. To use the library, we need to import it and do so at the top of our code, as shown here:
import random
So we’ve got access to random, we now can use it. For our case, we want to generate a random number (or more accurately, a random integer) using random.randint but it needs to be within the bounds of the screen we are using, so we define an upper bound and lower bound so our random integer will lie between those two bounds.
def update():
    alien.left += 2
    if alien.left > WIDTH:
        alien.topright = 0, random.randint(25, 375)
Lets run our code now and see what happens when our alien goes off the right side.
Again, if stuck, you can see a working example here: https://gist.github.com/KramKroc/f89555f19b4481c701db186501ee5364
Add a dash of colour!
Let’s add a bit of colour to the background. Although our alien in moving across the black void of space is totally reasonable, it possibly could look a bit more exciting :D
We’ll add a colour to fill our screen as part of the draw() function, but what does colour look like in Python? It uses something called RGB which uses 3 different values to define the colour. An excellent video here explains what RGB is: https://www.youtube.com/watch?v=CrBFNLvoL6A
To pick your RGB value, uses this site: https://www.w3schools.com/colors/colors_picker.asp
Then our draw becomes:
def draw():
    screen.fill((240, 6, 253))
    alien.draw()
Take a look at the working example if stuck: https://gist.github.com/KramKroc/c97e7869e762ac8a311ac34349c154ef
Add some interaction with a mouse click
Pygame Zero has a number of event hooks that allow interaction within the game. We’re going to use the on_mouse_down() hook to react to the player clicking somewhere on the screen.
To make that event even more useful, we can also get it to let us know what was the position of the pointer of the mouse when the click happens. We can use that position to see if we managed to click on our alien or not by calling the actors collidepoint(pos) function. This clearer with code:
def on_mouse_down(pos):
    if alien.collidepoint(pos):
        print("you hit me!")
    else:
        print("you missed me!")
Let’s run the code and keep an eye on the Mu Editor as it will print out the messages depending on whether you managed to click on the alien or not.
Check out the working example if lost: https://gist.github.com/KramKroc/dd95e0632c869addd070838de266d722
Add sound and a costume change
Pygame Zero provides the ability to play sounds using, you guessed it, the sounds function. You can see the sounds that come bundled with Pygame Zero by clicking on the Sounds button in the Mu Editor. We’ll use the eep.wav file when our alien is clicked. When we use sound, we don’t need to include the file extension, just the name of the sound, eep. Let’s add that into our on_mouse_down function as shown here:
def on_mouse_down(pos):
    if alien.collidepoint(pos):
        print("you hit me!")
        sounds.eep.play()
    else:
        print("you missed me!")
Let’s now take a look at how we swap the costume of our Actor, the alien. We simply need to define a new value for alien.image and we can see what images to use by clicking on the Images button in the Mu Editor. We’ll switch to the alien_hurt.png, but in a similar way that we didn’t need to specify the file extension for sounds, we also don’t need to do that here either:
def on_mouse_down(pos):
    if alien.collidepoint(pos):
        print("you hit me!")
        sounds.eep.play()
        alien.image = "alien_hurt"
    else:
        print("you missed me!")
Example working code here: https://gist.github.com/KramKroc/3b49522e6c62036c783ce06cfff6766a
Restore our Costume
Did you see what happened when we managed to click on our character. They changed costumes, but now they constantly look hurt. Wouldn’t it be good if they switched back to their normal costume after a small delay. Luckily, Pygame Zero has a clock object which provides methods to schedule calling functions, so let’s first create that function which we’ll call to switch the costume back:
def set_alien_normal():
    alien.image = "alien"
And we’ll update our on_mouse_down function to schedule a call to the new set_alien_normal function:
def on_mouse_down(pos):
    if alien.collidepoint(pos):
        print("you hit me!")
        sounds.eep.play()
        alien.image = "alien_hurt"
        clock.schedule_unique(set_alien_normal, 1.0)
    else:
        print("you missed me!")
You can change that 1.0 value so that it’s a shorter or longer delay before the alien switches back to the normal costume. If stuck, try our working example: https://gist.github.com/KramKroc/0601c5ec04485b786997ca16351c8737
